|
Advertisement
|
Failure on the Tugela
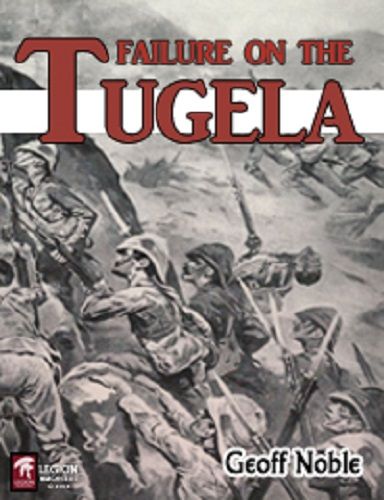
DescriptionFailure on the Tugela covers the attempts by the British to relieve Ladysmith following the failure at Colenso on the 15th December 1899. These attempts took place during the months on January and February 1900, most famously at Spion Kop. The core game will be the same as Redvers Reverse utilizing the same scale for the map and counters. To reiterate the games mechanics - it is at Battalion and Battery level with emphasis upon the leadership of the British at a Brigade level for Infantry and at Divisional level for the Cavalry. The key feature of the game is to present the player with the problems and difficulties that Buller himself faced. However there are key differences. Most notably is the fact that a game system that previously covered nothing more than a few hours will now cover a number of weeks. This is achieved by giving the player the opportunity to make a maximum of three breakthrough attempts in order to reach Ladysmith. This fits with the historical attempts on the Tabanyana Heights, Spion Kop and Val Krantz. Each breakthrough attempt, and its outcome, will have an impact on subsequent attempts. The player will have a series of predetermined target areas, at three different levels for each attempt. The level of success will determine the starting level of the Boer Confidence track for the next attempt. The more casualties inflicted the more diluted will be the Boer variable strength marker pool. However push too far and you own strength levels will be compromised with the increased likelihood of losing good quality leaders for the next breakthrough attempt. For each attempt you can push on into a second day but this is not without risk and will require you to reach a higher level of target area. Failure to reach any of the harder targets may well improve, rather than decrease Boer confidence levels. It would not be a British Empire campaign without command confusion and there is plenty of that here. Events cover the situation where, historically, there were three people who believed they were in command during the attempt to secure Spion Kop. In addition whilst Warren is in charge for the first, and probably the second attempt, he must achieve a level of success otherwise he is demoted and either Buller or Clery take charge. If Warren or Clery are in command then Events exist where Buller meddles and further confusion occurs. One change in the game map is that certain areas are designated ‘Peak areas’ and one area (Spion Kop) is split into three ‘Peak areas’. Peak areas improve Fire distances for artillery, are more vulnerable for defending Infantry (if not in an emplacement) and will be occupied by Boer units if vacant and adjacent to them. In addition they provide the reasoning behind employing a number of additional Event counters. Given some of the steep slopes certain movements will require the unit to stay put for a turn before moving again. There will be no searching for Drifts in Tugela, unlike Redvers Reverse, as the four main drifts are well known. There will be three Pontoon bridges which can be laid under certain conditions. However the third volume of the system will be moving to the Crimean War and the battle of Inkermann. This time, as the British, the player is in a largely defensive roll. Game DiscussionsAdd CommentYou need to be logged in to comment. Insert Bullet List Please enter at least one item. Item: Item: Item: Item: Item: Insert Numeric List Please enter at least one item. Item: Item: Item: Item: Item: Insert Link Please enter the link of the website Optionally you can add display text Insert Email Please enter the email address Optionally add any display text Insert Image Please enter the link of the image Insert YouTube Video Please enter the link of the video MarketplaceNo listings at the moment. Do you own this game? Click here to list it for sale.
|
Best Sellers
Board Games
|
||||
Latest Searches: Wake forest monopoly board game | webster parish opoly | VT Monopoly | automobile road games | thunderstorm barrera | Etobicoke | Urban dictionary | scott walker | kaws | folio | the child animatronic edition by hasbro | Dread realm | Camp | monopoly westminster md | Cartervilleopoly | that girl | London | Armageddon wars | Elf | lord zedd | Seaside Heights, NJ MONOPOLY | brink | woody woodpecker | National park | Monopoly durham NC edition | Mckinneyopoly | Monopoly Taylor Swift | horror surface | How+to+buy+Martyr+: | pathfinder base set
All Rights Reserved






Comments (0)